NPC Shopkeeper
The source code for this example plugin can be viewed at https://github.com/NFT-Worlds/WRLD-Example-Projects/tree/main/wrld-npc-shopkeeper. We'll be using the Citizens API alongside Amp Menus to easily create custom menus and NPCs.
tip
Get your hands dirty to learn quicker! Clone the examples repository and open this project using IntelliJ. Then run Maven package and install the plugin on a test server.
This example will cover implementing a Citizens custom trait that allows you to create NPC vendors that sell items for $WRLD.
Transaction payload
Our transaction payload for this example is very simple. It stores a single Bukkit ItemStack containing the items purchased by the player:
public class PlayerBuyItemPayload {
    public ItemStack items;

    public PlayerBuyItemPayload(ItemStack items) {
        this.items = items;
    }
}
Creating a custom menu
In our main plugin class, let's create a static ItemMenu variable called manu and configure it using the following in our onEnable method:
menu = new ItemMenu("Shop", ItemMenu.Size.TWO_LINE, plugin);

menu.setItem(17, new CloseItem());
menu.setItem(0, new AppleItem());
menu.setItem(1, new SteakItem());
CloseItem is a built-in item that closes an ItemMenu. However, we need to implement AppleItem and SteakItem ourself:
Custom items
Here's the class for AppleItem:
public class AppleItem extends MenuItem {
    private static final String DISPLAY_NAME = ChatColor.RED + "Apples!";
    private static final ItemStack ITEM = new ItemStack(Material.APPLE, 64);

    public AppleItem() {
        super(DISPLAY_NAME, ITEM);
    }

    // This method controls what happens when the MenuItem is clicked
    @Override
    public void onItemClick(ItemClickEvent event) {
        PlayerBuyItemPayload payload = new PlayerBuyItemPayload(ITEM);
        double price = 15.0;
        WRLDShopkeeperPlugin.getPayments().getNFTPlayer(event.getPlayer()).requestWRLD(
                price, Network.POLYGON, "Purchasing 64 apples", payload
        );
    }
}
This will display a stack of 64 apples titled "Apples" in red. When clicked it will create a WRLD payment request with the same items in a PlayerBuyItemPayload.
The SteakItem class looks almost identical:
public class SteakItem extends MenuItem {
    private static final String DISPLAY_NAME = ChatColor.RED + "Cooked Beef!";
    private static final ItemStack ITEM = new ItemStack(Material.COOKED_BEEF, 32);

    public SteakItem() {
        super(DISPLAY_NAME, ITEM);
    }

    // This method controls what happens when the MenuItem is clicked
    @Override
    public void onItemClick(ItemClickEvent event) {
        PlayerBuyItemPayload payload = new PlayerBuyItemPayload(ITEM);
        double price = 20.0;
        WRLDShopkeeperPlugin.getPayments().getNFTPlayer(event.getPlayer()).requestWRLD(
                price, Network.POLYGON, "Purchasing 32 cooked beef", payload
        );
    }
}
Creating a custom NPC trait
Next, we need to create a custom trait for our NPCs that we want to use as WRLD shopkeepers. Citizens allows you to define custom traits to attach arbitrary logic to any NPCs which have your trait. To do this, we create a new class:
public class WRLDShopkeeperNPCTrait extends Trait {
    WRLDShopkeeperPlugin plugin = null;

    public WRLDShopkeeperNPCTrait() {
        super("wrld-food-shopkeeper");
        plugin = JavaPlugin.getPlugin(WRLDShopkeeperPlugin.class);
    }

    @EventHandler
    public void onRightClick(NPCRightClickEvent event){
        if (event.getNPC() != this.getNPC()) {
            return;
        }
        WRLDShopkeeperPlugin.menu.open(event.getClicker());
    }

}
Then, we need to register our custom trait in the onEnable method of our main plugin class:
net.citizensnpcs.api.CitizensAPI.getTraitFactory().
    registerTrait(TraitInfo.create(WRLDShopkeeperNPCTrait.class)
        .withName("wrld-food-shopkeeper"));
Now, right clicking our NPC opens the menu we defined in the previous section:
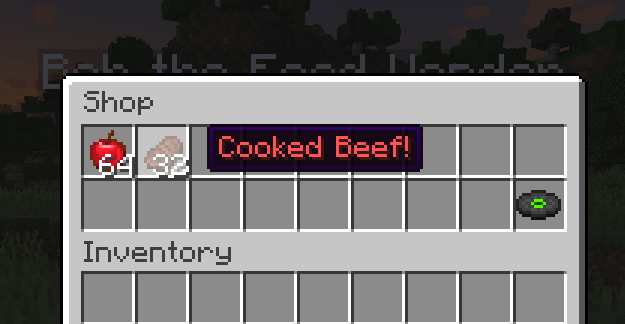
Clicking any of these options will trigger a WRLD payment request.
Handling the PlayerTransactEvent
Since all our item information is stored in the PlayerBuyItemPayload, our PlayerTransactEventListener can be very simple:
public class PlayerTransactEventListener implements Listener {

    @EventHandler
    public void onPlayerTransact(PlayerTransactEvent<?> e) {
        if (e.getPayload() instanceof PlayerBuyItemPayload payload) {
            e.getPlayer().sendMessage("Transaction complete!");
            e.getPlayer().getInventory().addItem(payload.items);
        }
    }
}
Setting up a test server
Once you've compiled your plugin, place it in the plugins folder of a Paper server alongside the WRLD-Payments-API jarfile which you can download from GitHub. Additionally, you'll the Citizens plugin as this example depends on it.
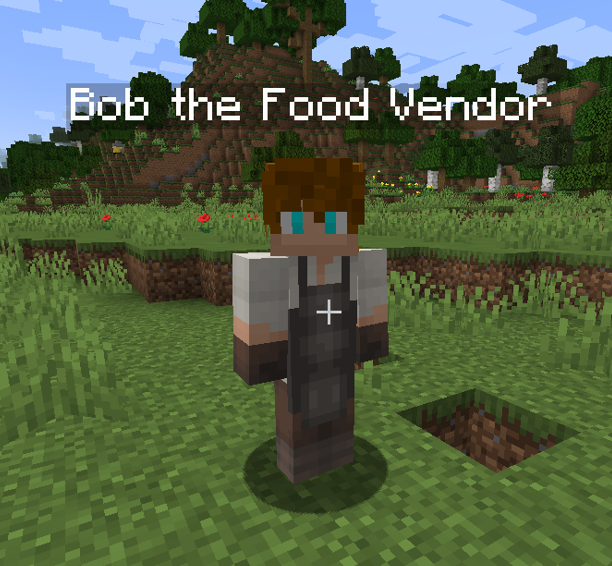
Once you're in game, you'll need to create an NPC and give it the wrld-food-shopkeeper trait with the following sequence of commands:
/npc create Bob the Food Vendor
/trait add wrld-food-shopkeeper
Now you should have a working food vendor NPC. You can customize the code in this example to perform any arbitrary task. In addition to selling items, you can sell ranks, cosmetics, mobs, event tickets, or whatever you can imagine!